So, you’re a rock star parent, you have organized the family, planned wardrobes, styled hair and had your portrait session photographed! Now you are at the point of choosing how you would love to display your new portrait art in your home. The first step is deciding which images are grabbing your heart and you know you have to have them on your walls and what type of mounting options suit your style. I will be happy to suggest combinations of images and sizes that I think complement one another and tell the story of your family. Read on for some gorgeous wall gallery inspiration and tips on how to create them.
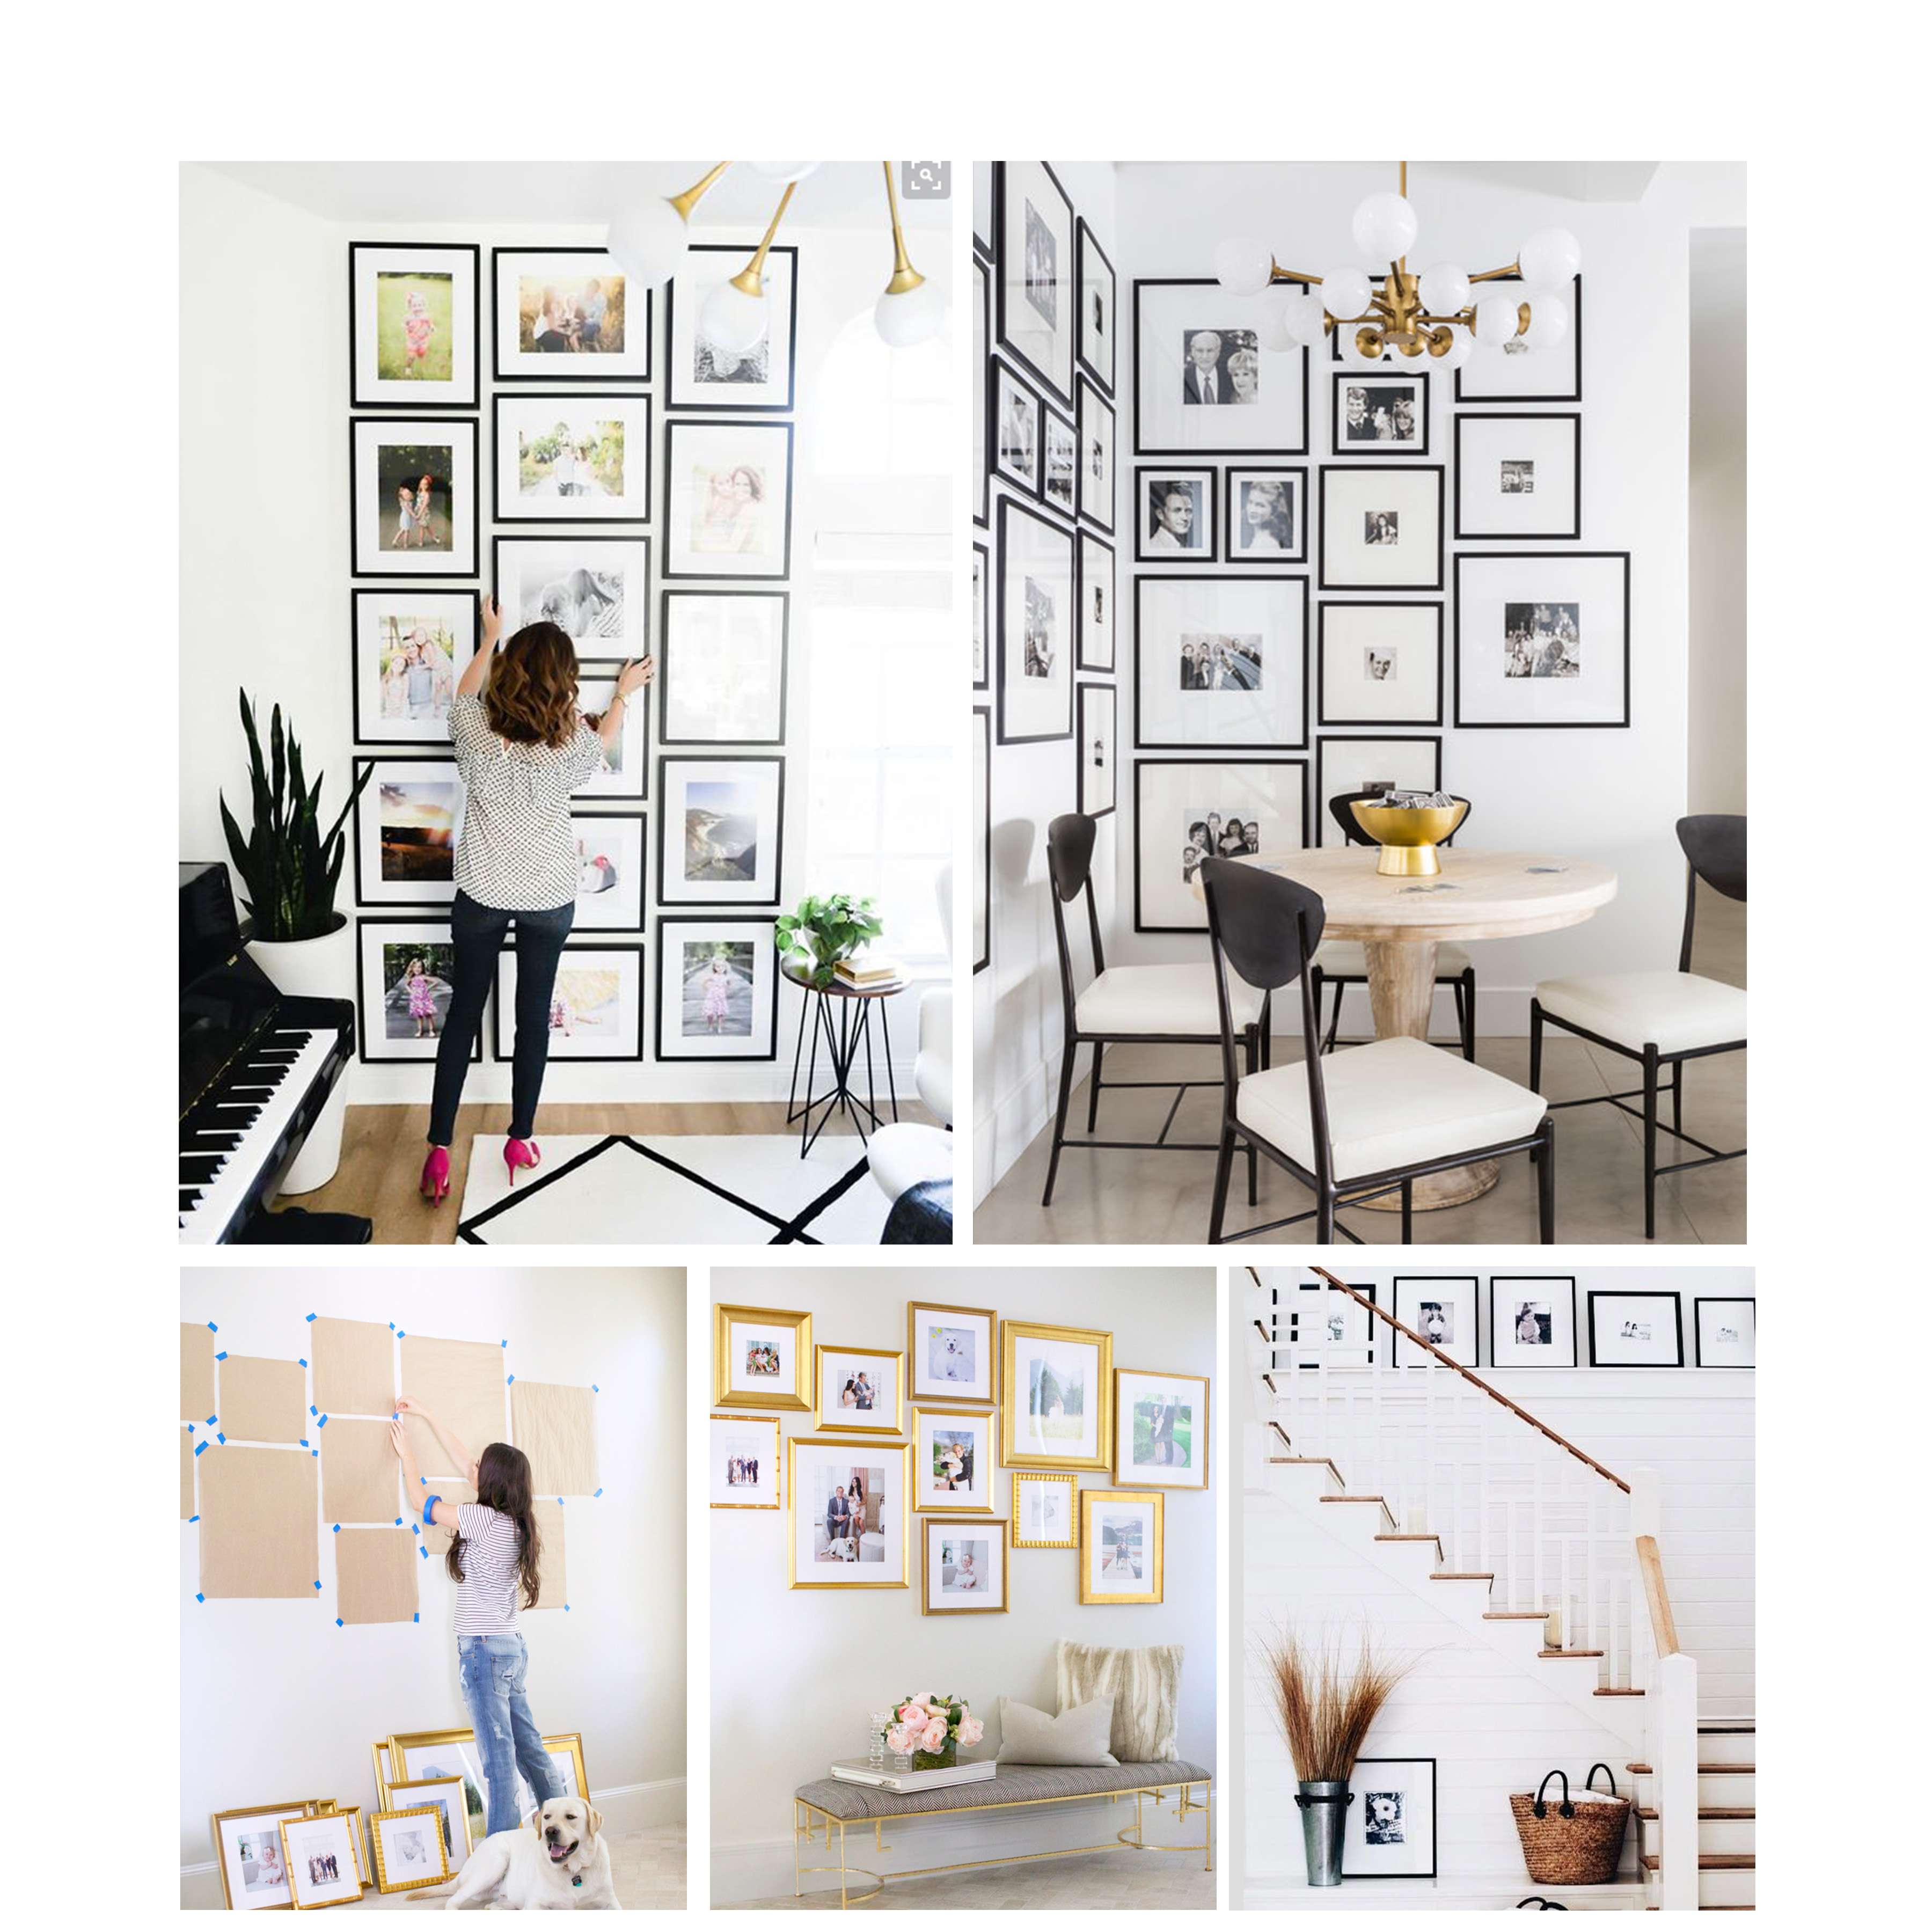
Images via: Curated Interior and Pink Peonies Blog
Framed prints are both sleek and timeless. A few places to pick up gorgeous ready made gallery frames are West Elm, Indigo, Pottery Barn, Michaels and Ikea. Click on the store name to see the selections they offer. Ikea also now offers templates for wall galleries using their frames check here. When creating your gallery wall you can stick to including only your new portraits or combine them with favorite travel,graphic or calligraphy prints for a contemporary and unique collection. To see some samples click here.
A common mistake people make when ordering or having prints made is going too small. For great impact the difference between a “photo” and a piece of art can be scale. Don’t fall into the trap of 8×10 prints, go for it- frame a stunning 16×20 or 24×36 print of your children, you won’t regret it! Or mix a couple of large portraits with smaller prints of art or historical family photos.
Planning and Hanging
Planning
1)Measure the space of wall you want to fill.
2) Decide what size frames will fill the space nicely, optionally you could cut kraft paper squares in the size you think you want your frames and tape them to the wall with painter’s tape to see if that size is filling the space well. Often people find they want to go to a bit larger frame size.
3)Decide whether you would like all your frames the same size or go for a variety of sizes. Same goes for whether you want all the same colour frames or a mix. I recommend keeping the frames all the same if you are going for a look with frames all the same size, for a more eclectic look a variety works nicely.
4)Decide which of your photos you want to print and which size suits each print-for example which ones you want big, which ones suit a smaller frame and whether you want all portraits or a mix of portraits with other art or photographs.
Hanging-Tools
You will need:
1)kraft paper
2)painters tape
3) pencil,scissors and level
4) hammer and nails
Hanging the Wall
– First a note about height
A good guideline is to have the center of your largest frame 57-60 inches up front he floor. This is the standard height for hanging art, then you can work around that piece. If you are hanging two medium size pieces above one another the space in-between them should be at 57-60inches. See Photo examples below.
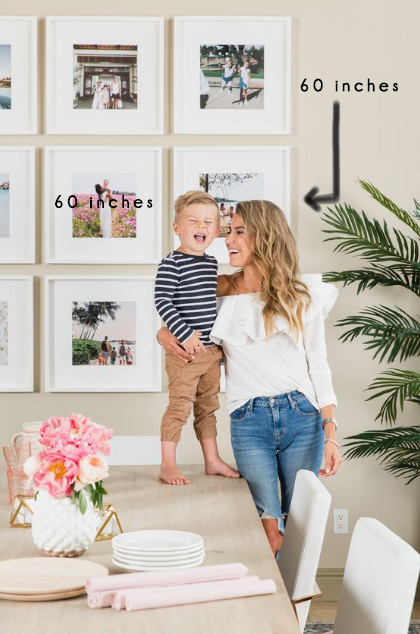
image credit:Hellofashionblog
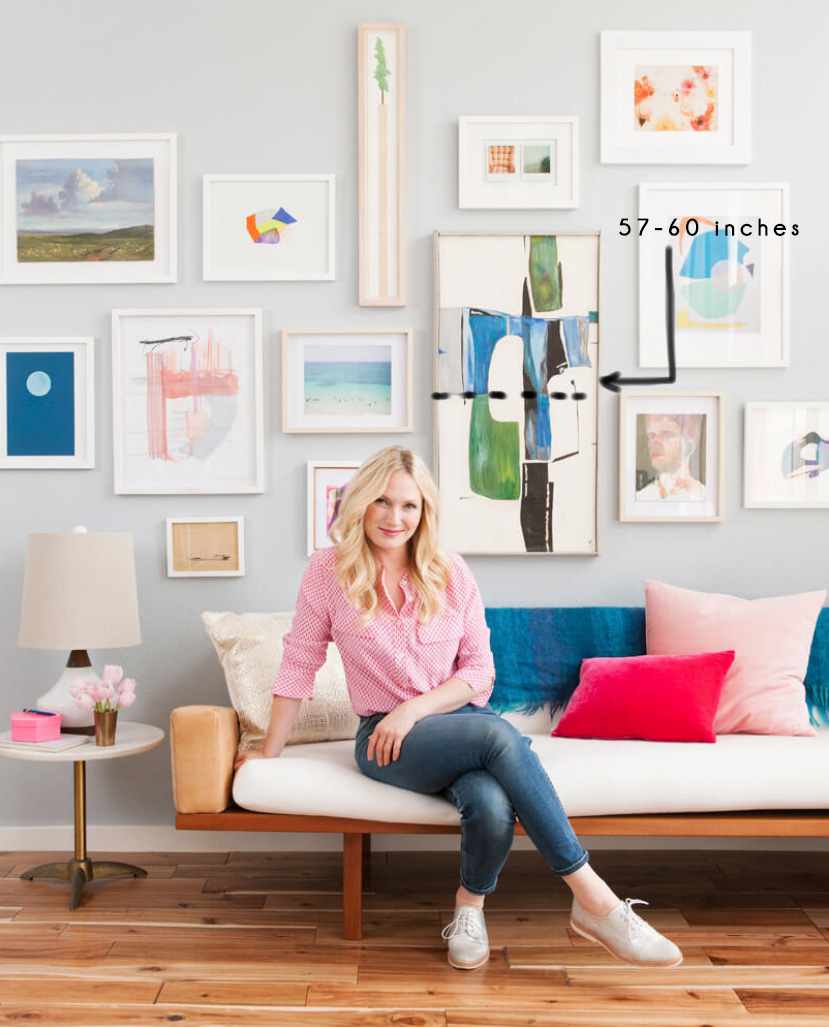
Image:Em Hendersen
![]()
![]()
Image Via-Apartment Therapy
About Spacing
Aim for 2-3 inches between frames, if hanging above a sofa or table aim for 6-8 inches of space between the top of the sofa/table and the bottom of your frame.
Get Started
1) Lay out all of your frames on top of Kraft paper, use a pencil to trace to the frame onto the paper and then cut out the shape.
2) For frames with a wire: pull the wire taught as it would be hanging from a nail-measure the length from the center of the wire to the top of the frame. For example if this length is 2 inches, make a dot with your pencil in the center of your paper two inches down from the top center- this is where your nail will go. These measurements need to be as exact as possible. Continue this process with all of your frames and cutouts. For frames with a claw tooth hanger an alternative to this method is to measure once your paper cutouts are already on your wall-then you add small dab of white toothpaste to the center of the claw tooth and then place your frame flush over your cut out on the wall-pull the frame back from the wall and the toothpaste will have made a mark on your cutout where the nail needs to go.
![]()
![]()
3) Next using the height guidelines start taping your cutouts to the wall in the style you have chosen. Use painters tape to attach them as it will not damage your walls.
Image Credit:Momtasticblog
4) Hammer in your nails where you made the dots on your cut outs in step 2.
5) remove the paper from one spot and hang your first frame. Continue until all of your frames are on the wall.
6)Place your level on top of each frame to make sure it’s straight. Make any adjustments. For sawtooth hangers if your nail is not resting on the middle groove your frame may look a bit off-it you notice this simply adjust it to the center groove.
YAY! You’ve hung a fabulous new gallery wall!!
Image Credits 1) Hellofashionblog.com 2)Pinterest 3)Pinterest 4)PinkPeoniesBlog
Now, watch these fantastic videos with step by step tips for making your perfect gallery wall!
*For the example in video #2 those awesome hanging tools can be found at home depot!